Categories Example for Blazor

Nevron NOV Schedule for Blazor ships with hundreds of examples with full source code, as part of the Nevron Open Vision Suite. All Blazor Schedule examples are also available as a stand-alone Visual Studio solution in C#, which you can download from the links below.

Categories Example for Blazor Description

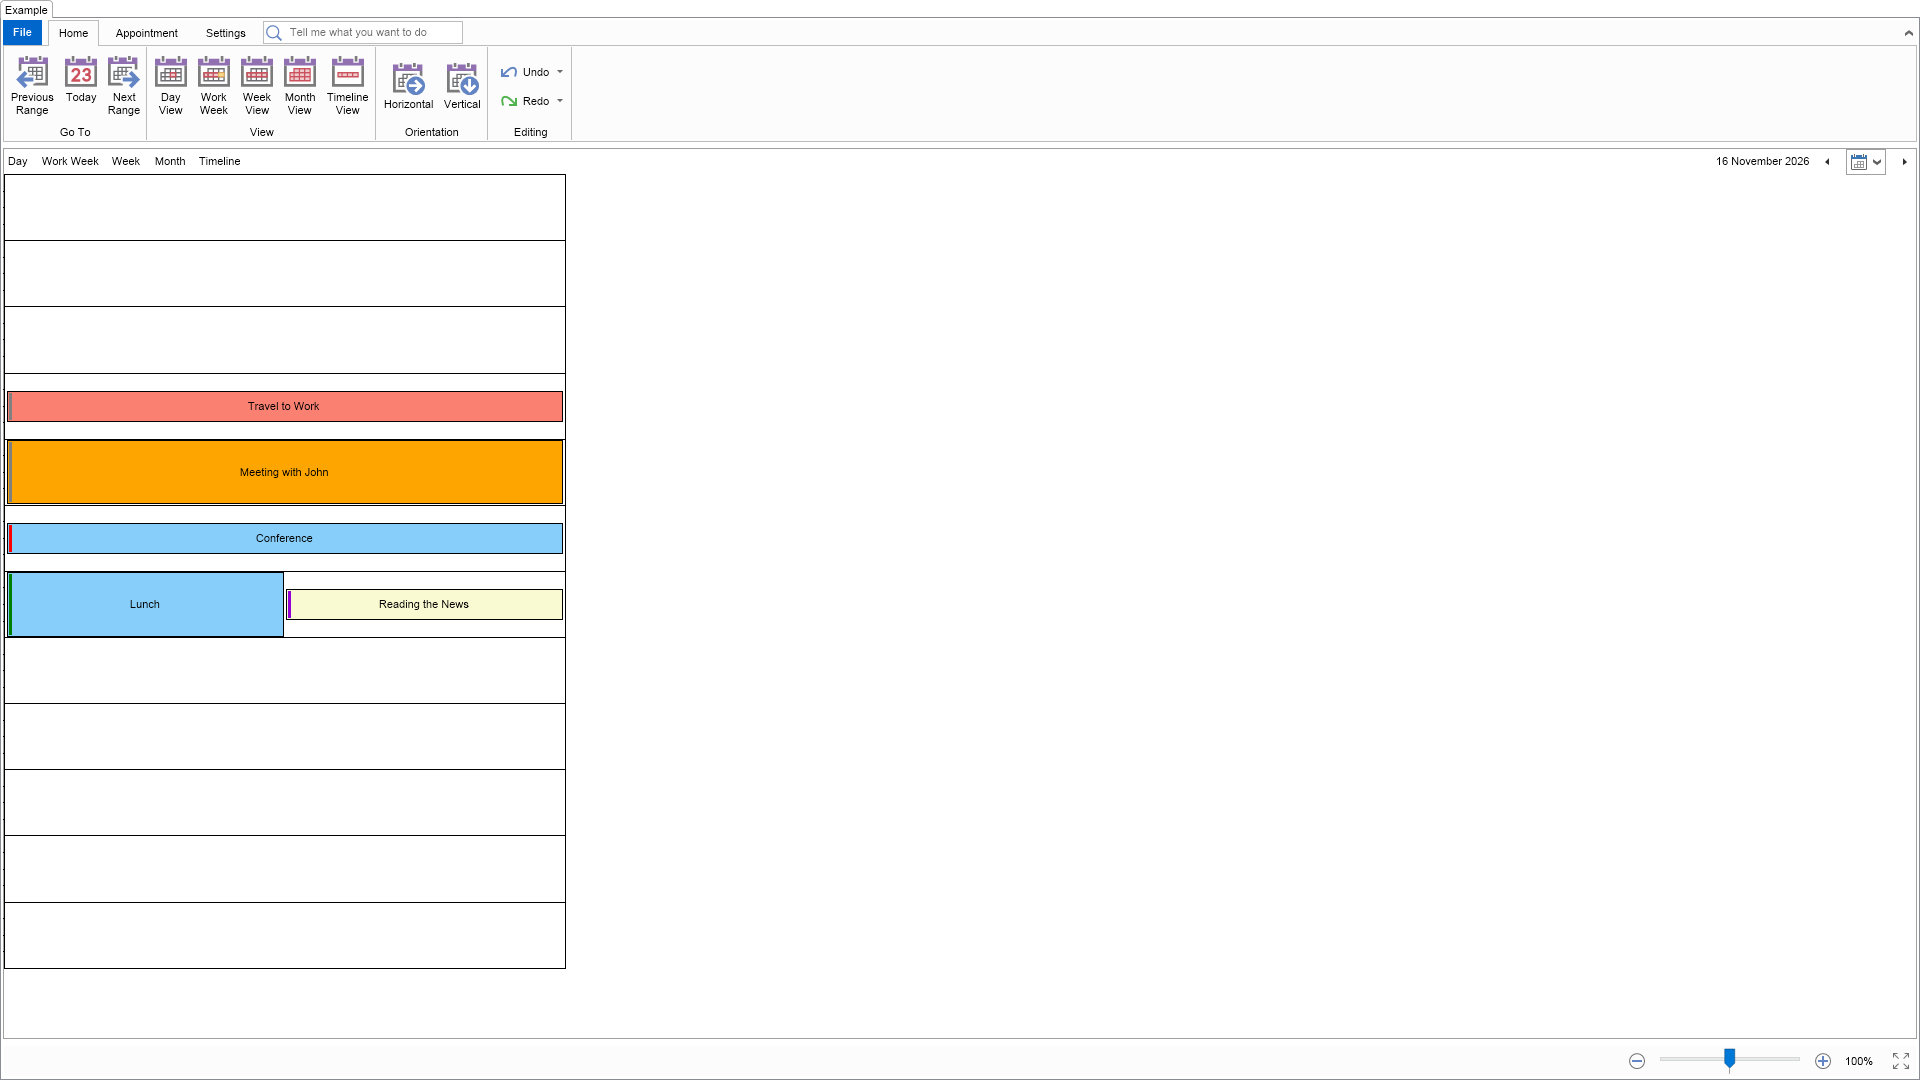
This example demonstrates how to create and add appointments to a schedule and how to categorize them through code. To categorize an appointment means to assign a category and/or a time marker to it. The schedule contains a collection of default categories and time markers, but you can easily modify them when needed.


Categories Example

C# Categories Example Code for Nevron Schedule for Blazor
Language: C#

using Nevron.Nov;
using Nevron.Nov.Dom;
using Nevron.Nov.Graphics;
using Nevron.Nov.Layout;
using Nevron.Nov.Schedule;
using Nevron.Nov.UI;
using Nevron.Nov.Windows.Forms;
using System;
using System.Windows.Forms;

namespace NovWinFormsProject
{
	public partial class Form1 : Form
	{
		#region Constructors

		public Form1()
		{
			InitializeComponent();

			// Set form title
			Text = "NOV WinForms - NCategoriesExample";

			// Create the NOV example and its controls
			NWidget exampleContent = CreateExampleContent();
			NWidget exampleControls = CreateExampleControls();
			if (exampleControls != null)
			{
				exampleControls.PreferredWidth = 300;
			}

			// Place the example and its controls in a pair box
			NPairBox pairBox = new NPairBox(exampleContent, exampleControls);
			pairBox.FillMode = ENStackFillMode.First;
			pairBox.FitMode = ENStackFitMode.First;
			pairBox.Margins = new NMargins(NDesign.HorizontalSpacing, NDesign.VerticalSpacing);

			// Host the example in the form
			NNovWidgetHost host = new NNovWidgetHost(pairBox);
			host.Dock = DockStyle.Fill;
			Controls.Add(host);
		}

		#endregion

		#region Example

		public NWidget CreateExampleContent()
		{
			// Create a simple schedule
			NScheduleViewWithRibbon scheduleViewWithRibbon = new NScheduleViewWithRibbon();
			m_ScheduleView = scheduleViewWithRibbon.View;

			m_ScheduleView.Document.PauseHistoryService();
			try
			{
				InitSchedule(m_ScheduleView.Content);
			}
			finally
			{
				m_ScheduleView.Document.ResumeHistoryService();
			}

			// Return the commanding widget
			return scheduleViewWithRibbon;
		}
		public NWidget CreateExampleControls()
		{
			return null;
		}
		public string GetExampleDescription()
		{
			return @"

This example demonstrates how to create and add appointments to a schedule and how to categorize them through code. To categorize an appointment means to assign a category and/or a time marker to it. The schedule contains a collection of default categories and time markers, but you can easily modify them when needed.

"; } /// /// Gets the relevant documentation links for the example /// /// public (string Name, string Url)[] GetDocumentationUrls() { return new[] { ("Schedule Appointment Categorization", "https://www.nevron.com/docs/openvision/schedule-appointment-categorization.html"), ("Schedule Appointments", "https://www.nevron.com/docs/openvision/schedule-appointments.html"), }; } #endregion #region Implementation private void InitSchedule(NSchedule schedule) { DateTime today = DateTime.Today; schedule.ViewMode = ENScheduleViewMode.Day; // The categories of the schedule are stored in its Categories collections and by default are: // "Orange", "Red", "Blue", "Green", "Purple" and "Yellow" // You can either use these names (case sensitive), or obtain them from the Categories collection of the schedule // Create an appointment and associate it with the "Red" category NAppointment appointment = new NAppointment("Travel to Work", today.AddHours(6.5), today.AddHours(7.5)); appointment.Category = NCategory.Color.Red; schedule.Appointments.Add(appointment); // Create an appointment and associate it with the first category of the schedule appointment = new NAppointment("Meeting with John", today.AddHours(8), today.AddHours(10)); appointment.Category = schedule.Categories[0].Name; schedule.Appointments.Add(appointment); // Time markers are similar to categories with the diference that they only color the header of an appointment. // The time markers of a schedule are stored in its TimeMarkers collection and by default are: // "Free", "Tentative", "Busy" and "Out of Office" // You can either use these names (case sensitive), or obtain them from the TmieMarkers collection of the schedule // Create an appointment and assign the "Busy" time marker to it appointment = new NAppointment("Conference", today.AddHours(10.5), today.AddHours(11.5)); appointment.TimeMarker = NTimeMarker.Type.Busy; schedule.Appointments.Add(appointment); // Create an appointment and assign the first time marker of the schedule to it appointment = new NAppointment("Lunch", today.AddHours(12), today.AddHours(14)); appointment.TimeMarker = schedule.TimeMarkers[0].Name; schedule.Appointments.Add(appointment); // Create an appointment and assign both a category and a time marker to it appointment = new NAppointment("Reading the News", today.AddHours(12.5), today.AddHours(13.5)); appointment.Category = NCategory.Color.Yellow; appointment.TimeMarker = NTimeMarker.Type.Tentative; schedule.Appointments.Add(appointment); } #endregion #region Event Handlers #endregion #region Fields private NScheduleView m_ScheduleView; #endregion #region Static Methods #endregion #region Constants #endregion #region Nested Types #endregion } }

Download a fully functional C# (.cs) Categories Example for Blazor Solution