Layered Tree Layout Example for Blazor

Nevron NOV Diagram for Blazor ships with hundreds of examples with full source code, as part of the Nevron Open Vision Suite. All Blazor Diagram examples are also available as a stand-alone Visual Studio solution in C#, which you can download from the links below.

Layered Tree Layout Example for Blazor Description

The layered tree layout represents a classical directed tree layout (e.g. with uniform parent placement), which places vertices from the same level in layers. It produces both straight line and orthogonal tree drawings, which is controlled by the OrthogonalEdgeRouting property. The PlugSpacing property controls the spacing between the plugs of a node. You can set a fixed amount of spacing or a proportional spacing, which means that the plugs are distributed along the whole side of the node. The layout satisfies the following aesthetic criteria:

  • No edge crossings - edges do not cross each other.
  • No vertex-vertex overlaps - vertices do not overlap each other.
  • No vertex-edge overlaps - in case of orthogonal edge routing, this criteria is met when the BusBetweenLayers property is set to true.
  • Straight line routing - in case the OrthogonalEdgeRouting property is set to false you can consider modifying the PortStyle property, which controls the anchoring of the lines to the vertex boxes.
  • Compactness - you can optimize the compactness of the drawing in the tree breadth dimension by setting the CompactBreadth property to true.

To experiment with the layout just change its properties from the property grid and click the Layout button.

To see the layout in action on a different trees, just click the Random Tree buttons.
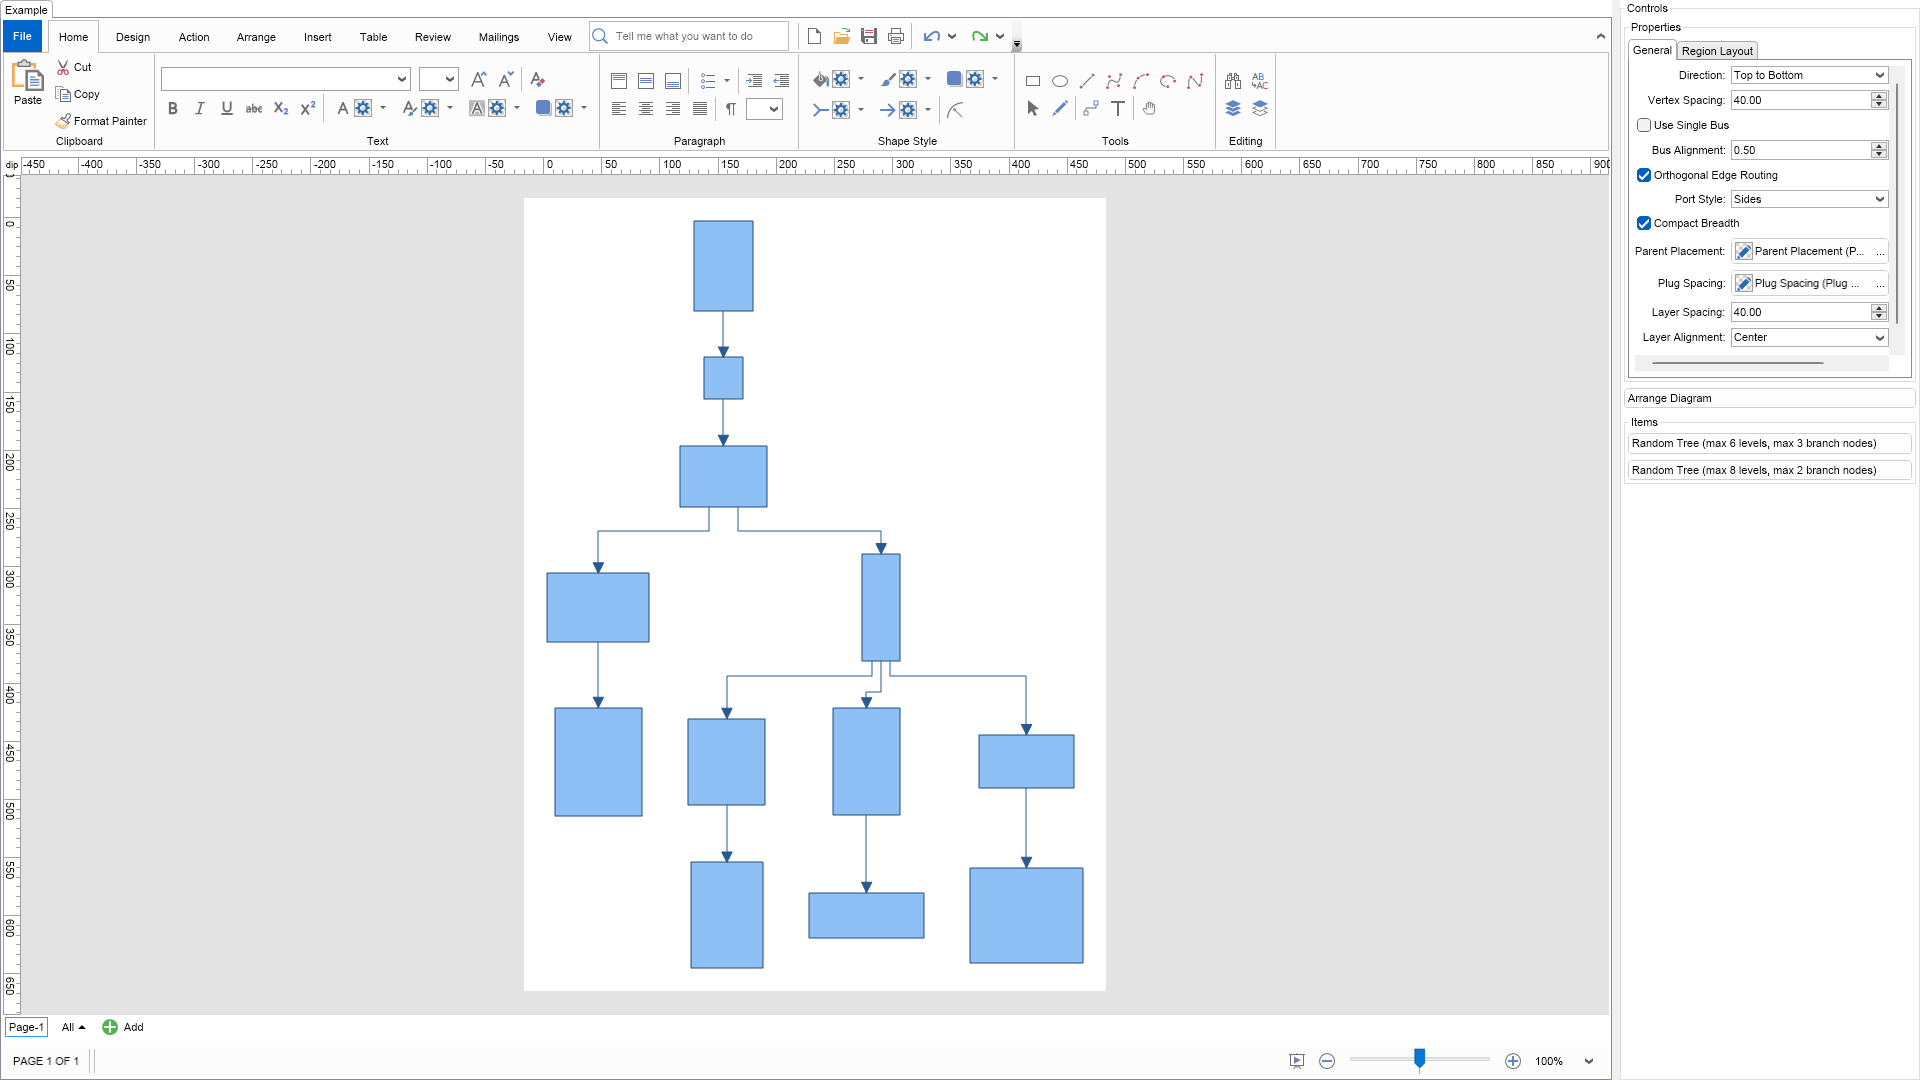

Layered Tree Layout Example

C# Layered Tree Layout Example Code for Nevron Diagram for Blazor
Language: C#

using Nevron.Nov;
using Nevron.Nov.DataStructures;
using Nevron.Nov.Diagram;
using Nevron.Nov.Diagram.Layout;
using Nevron.Nov.Diagram.Shapes;
using Nevron.Nov.Dom;
using Nevron.Nov.Editors;
using Nevron.Nov.Graphics;
using Nevron.Nov.Layout;
using Nevron.Nov.UI;
using Nevron.Nov.Windows.Forms;
using System.Windows.Forms;

namespace NovWinFormsProject
{
	public partial class Form1 : Form
	{
		#region Constructors

		public Form1()
		{
			InitializeComponent();

			// Set form title
			Text = "NOV WinForms - NLayeredTreeLayoutExample";

			// Create the NOV example and its controls
			NWidget exampleContent = CreateExampleContent();
			NWidget exampleControls = CreateExampleControls();
			if (exampleControls != null)
			{
				exampleControls.PreferredWidth = 300;
			}

			// Place the example and its controls in a pair box
			NPairBox pairBox = new NPairBox(exampleContent, exampleControls);
			pairBox.FillMode = ENStackFillMode.First;
			pairBox.FitMode = ENStackFitMode.First;
			pairBox.Margins = new NMargins(NDesign.HorizontalSpacing, NDesign.VerticalSpacing);

			// Host the example in the form
			NNovWidgetHost host = new NNovWidgetHost(pairBox);
			host.Dock = DockStyle.Fill;
			Controls.Add(host);
		}

		#endregion

        #region Example

        public NWidget CreateExampleContent()
        {
            // Create a simple drawing
            NDrawingViewWithRibbon drawingViewWithRibbon = new NDrawingViewWithRibbon();
            m_DrawingView = drawingViewWithRibbon.View;

            m_DrawingView.Document.HistoryService.Pause();
            try
            {
                InitDiagram(m_DrawingView.Document);
            }
            finally
            {
                m_DrawingView.Document.HistoryService.Resume();
            }

            return drawingViewWithRibbon;
        }
        public NWidget CreateExampleControls()
        {
            m_Layout.Changed += OnLayoutChanged;

            NStackPanel stack = new NStackPanel();

            // property editor
            NEditor editor = NDesigner.GetDesigner(m_Layout).CreateStandaloneEditor(m_Layout);
            stack.Add(new NGroupBox("Properties", editor));

            NButton arrangeButton = new NButton("Arrange Diagram");
            arrangeButton.Click += OnArrangeButtonClick;
            stack.Add(arrangeButton);

            // items stack
            NStackPanel itemsStack = new NStackPanel();

            // NOTE: For Tree layouts we provide the user with the ability to generate random tree diagrams so that he/she can test the layouts
            NButton randomTree1Button = new NButton("Random Tree (max 6 levels, max 3 branch nodes)");
            randomTree1Button.Click += OnRandomTree1ButtonClick;
            itemsStack.Add(randomTree1Button);

            NButton randomTree2Button = new NButton("Random Tree (max 8 levels, max 2 branch nodes)");
            randomTree2Button.Click += OnRandomTree2ButtonClick;
            itemsStack.Add(randomTree2Button);

            stack.Add(new NGroupBox("Items", itemsStack));

            return stack;
        }
        public string GetExampleDescription()
        {
            return @"
	

The layered tree layout represents a classical directed tree layout (e.g. with uniform parent placement), which places vertices from the same level in layers. It produces both straight line and orthogonal tree drawings, which is controlled by the OrthogonalEdgeRouting property. The PlugSpacing property controls the spacing between the plugs of a node. You can set a fixed amount of spacing or a proportional spacing, which means that the plugs are distributed along the whole side of the node. The layout satisfies the following aesthetic criteria:

  • No edge crossings - edges do not cross each other.
  • No vertex-vertex overlaps - vertices do not overlap each other.
  • No vertex-edge overlaps - in case of orthogonal edge routing, this criteria is met when the BusBetweenLayers property is set to true.
  • Straight line routing - in case the OrthogonalEdgeRouting property is set to false you can consider modifying the PortStyle property, which controls the anchoring of the lines to the vertex boxes.
  • Compactness - you can optimize the compactness of the drawing in the tree breadth dimension by setting the CompactBreadth property to true.

To experiment with the layout just change its properties from the property grid and click the Layout button.

To see the layout in action on a different trees, just click the Random Tree buttons.

"; } /// /// Gets the relevant documentation links for the example /// /// public (string Name, string Url)[] GetDocumentationUrls() { return new[] { ("Layered Tree Layout", "https://www.nevron.com/docs/openvision/diagram-layered-tree-layout.html"), ("Layouts Overview", "https://www.nevron.com/docs/openvision/diagram-drawing-layouts-overview.html"), ("Graph Regions and Regions Layouts", "https://www.nevron.com/docs/openvision/diagram-graph-regions-and-region-layouts.html"), }; } private void InitDiagram(NDrawingDocument drawingDocument) { // Hide ports drawingDocument.Content.ScreenVisibility.ShowPorts = false; // Create random diagram NGenericTreeTemplate template = new NGenericTreeTemplate(); template.EdgeUserClass = NDR.StyleSheetNameConnectors; template.Balanced = false; template.Levels = 6; template.BranchNodes = 3; template.HorizontalSpacing = 10; template.VerticalSpacing = 10; template.VertexSize = new NSize(50, 50); template.VertexSizeDeviation = 1; template.Create(drawingDocument); // Arrange diagram ArrangeDiagram(drawingDocument); // Fit active page drawingDocument.Content.ActivePage.ZoomMode = ENZoomMode.Fit; } #endregion #region Implementation /// /// Arranges the shapes in the active page. /// /// private void ArrangeDiagram(NDrawingDocument drawingDocument) { // get all top-level shapes that reside in the active page NPage activePage = drawingDocument.Content.ActivePage; NList shapes = activePage.GetShapes(false); // create a layout context and use it to arrange the shapes using the current layout NDrawingLayoutContext layoutContext = new NDrawingLayoutContext(drawingDocument, activePage); m_Layout.Arrange(shapes.CastAll(), layoutContext); // size the page to the content size activePage.SizeToContent(); } #endregion #region Event Handlers private void OnRandomTree1ButtonClick(NEventArgs arg) { NDrawingDocument drawingDocument = m_DrawingView.Document; drawingDocument.StartHistoryTransaction("Create Random Tree 1"); try { drawingDocument.Content.ActivePage.Items.Clear(); // create a random tree NGenericTreeTemplate tree = new NGenericTreeTemplate(); tree.EdgeUserClass = NDR.StyleSheetNameConnectors; tree.Levels = 6; tree.BranchNodes = 3; tree.HorizontalSpacing = 10; tree.VerticalSpacing = 10; tree.VertexShape = VertexShape; tree.VertexSize = VertexSize; tree.Balanced = false; tree.VertexSizeDeviation = 1; tree.Create(drawingDocument); // layout the tree ArrangeDiagram(drawingDocument); } finally { drawingDocument.CommitHistoryTransaction(); } } private void OnRandomTree2ButtonClick(NEventArgs arg) { NDrawingDocument drawingDocument = m_DrawingView.Document; drawingDocument.StartHistoryTransaction("Create Random Tree 2"); try { drawingDocument.Content.ActivePage.Items.Clear(); // create a random tree NGenericTreeTemplate tree = new NGenericTreeTemplate(); tree.EdgeUserClass = NDR.StyleSheetNameConnectors; tree.Levels = 8; tree.BranchNodes = 2; tree.HorizontalSpacing = 10; tree.VerticalSpacing = 10; tree.VertexShape = VertexShape; tree.VertexSize = VertexSize; tree.Balanced = false; tree.VertexSizeDeviation = 1; tree.Create(drawingDocument); // layout the tree ArrangeDiagram(drawingDocument); } finally { drawingDocument.CommitHistoryTransaction(); } } private void OnLayoutChanged(NEventArgs arg) { ArrangeDiagram(m_DrawingView.Document); } private void OnArrangeButtonClick(NEventArgs arg) { ArrangeDiagram(m_DrawingView.Document); } #endregion #region Fields private NDrawingView m_DrawingView; private NLayeredTreeLayout m_Layout = new NLayeredTreeLayout(); #endregion #region Static Methods #endregion #region Constants private const ENBasicShape VertexShape = ENBasicShape.Rectangle; private static readonly NSize VertexSize = new NSize(60, 60); #endregion #region Nested Types #endregion } }

Download a fully functional C# (.cs) Layered Tree Layout Example for Blazor Solution